|
E-MAIL SETUP INSTRUCTIONS - Thunderbird Mail
If using the Wizard setup or the step-by-step instructions below, you will need to know these four things in advance:
- User Name: name.domain (your email name, but replace the @ sign with a period, and remove the .com)
- Password: ****** (the password we assign) - The password can be changed to any secure password you want to use, but we need to change it on the server to match - so let us know if you need to change it.
- Mail Server: mail.wordwebdesign.com - Use this for both the incoming & outgoing mail servers (POP & SMTP)
- Ports: Incoming POP port 995, and Outgoing SMTP port 587 (with TLS encryption)
E-mail accounts are 'standard' POP3 accounts. Please contact us for setup on Microsoft Exchange Servers, or for IMAP options.
STEP 1
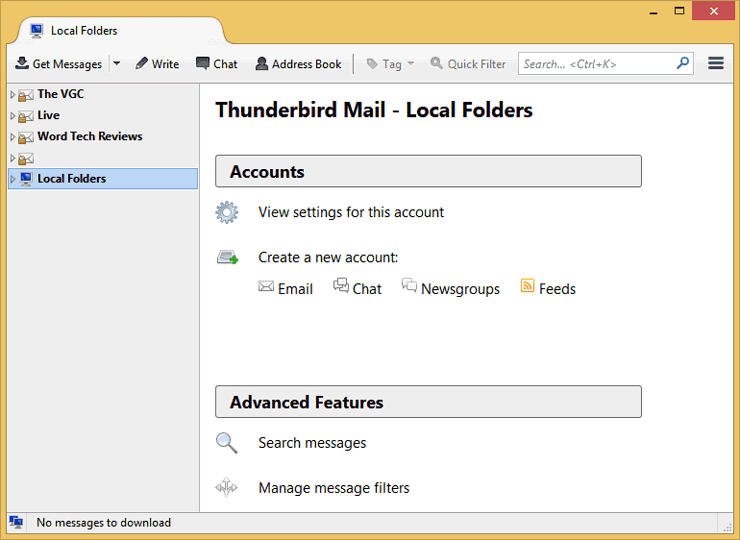
Open Thunderbird to the main window.
STEP 2
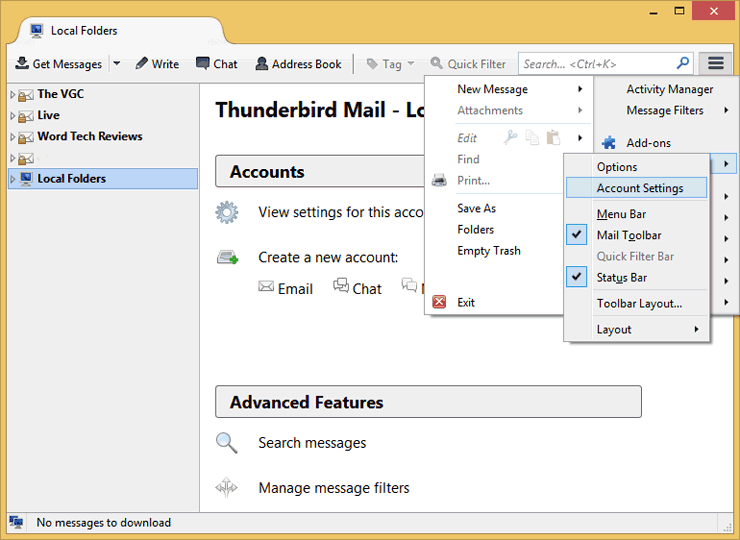
Click the Tools button in the upper-right of Thunderbird, then hover over Options and click on Account Settings
STEP 3
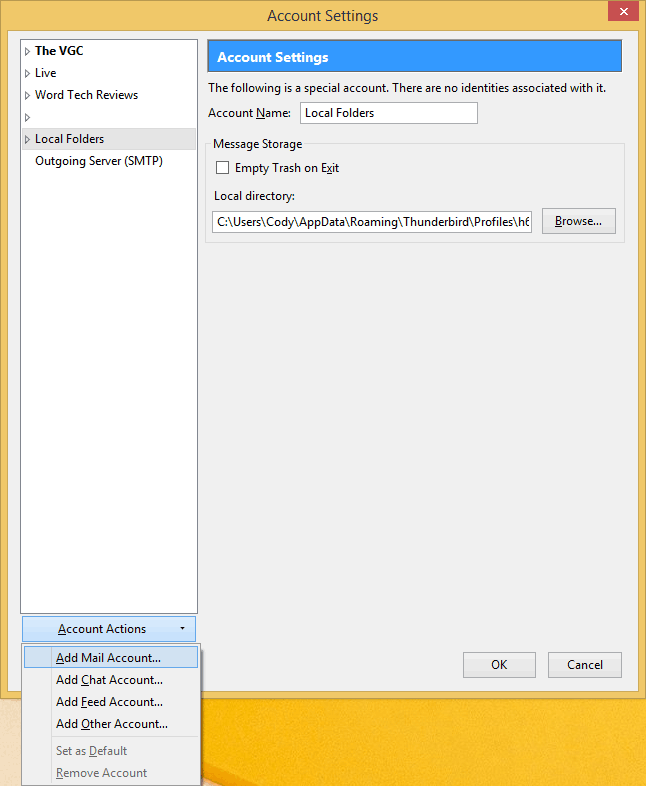
In the Account Settings window, click Account Actions, then Add Mail Account...
STEP 4
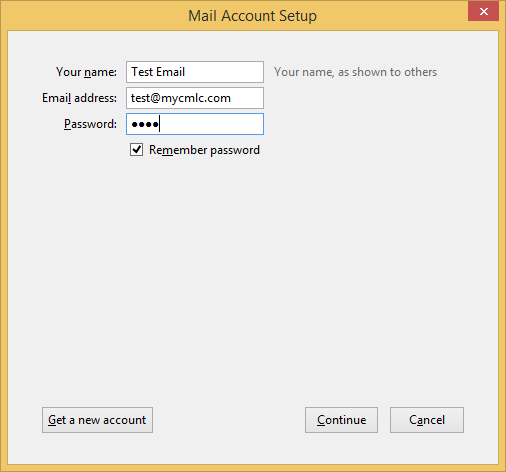
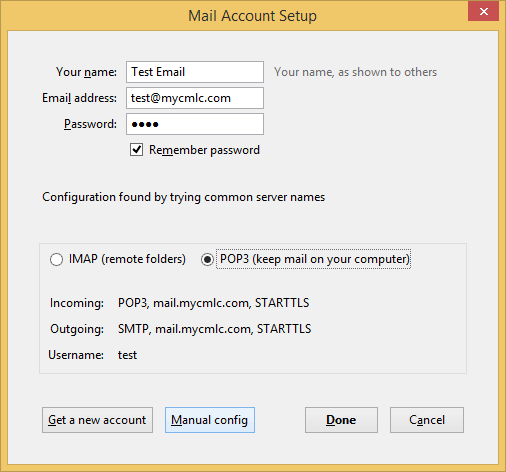
In the Mail Account Setup window, enter your name as you want it to appear on your emails, the email address provided to you, and your email password. Then click Continue.
STEP 5
Thunderbird will probe the server for the default configuration settings. However, we need to use different ones, so click Manual config once the button is available.
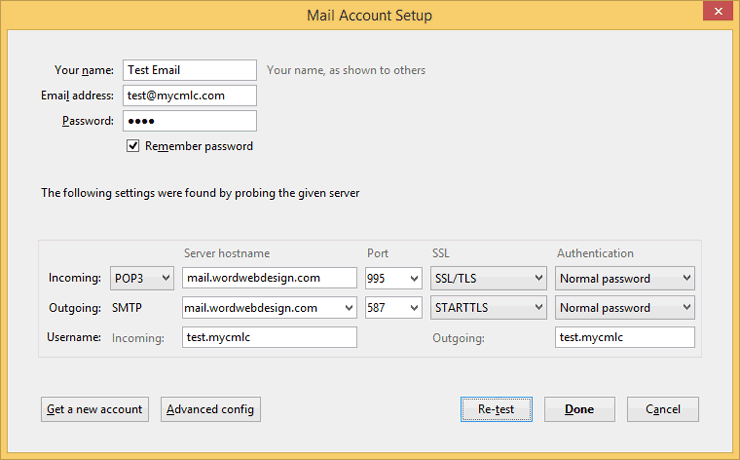
STEP 6
Make sure the Incoming dropdown is set to POP3. For both Incoming and Outgoing fields under Server hostname, enter mail.wordwebdesign.com. Set the Incoming Port to 995, and the Outgoing Port to 587. Under SSL, set Incoming to SSL/TLS and Outgoing to STARTTLS. Both Authentication menus should be set to Normal password. In the Username fields, set both to your email address' prefix, followed by a period, then your email domain without the domain suffix (for example: test@mycmlc.com would be test.mycmlc). Once all of this is done, click Re-test.
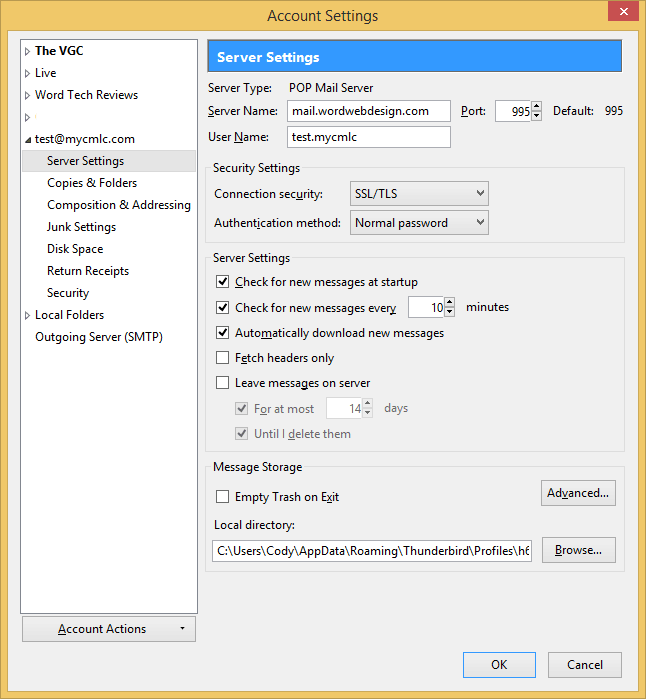
STEP 7
After you've set up the mail account, you'll be taken back to the Account Settings window. From here, on the left, find your new account and underneath, click Server Settings. On the right, under the Server Settings group, uncheck the box reading Leave messages on server. This is crucial to ensuring that your mailbox doesn't fill up immediately!
Thank you for choosing WORD Web Hosting for your e-mail needs.
Call us today at 503-869-4970 to schedule a free consultation, or
complete our convenient online Request for Quotation form. |
|
HOME | WEB DESIGN | PORTFOLIO | TESTIMONIALS | RFQ | BRANDING | COPYWRITING | WEB HOSTING | SEO
BUSINESS CARDS | STATIONERY | BROCHURES | SIGNS & BANNERS | ABOUT US | CONTACT US | TECH SUPPORT
SPECIALTY SERVICES:
HEALTH CARE PROFESSIONALS | RACE TEAM MARKETING
|